Mastering the Foundation: Ingredients for an Irresistible Stuffing
The aroma of buttery herbs and savory bread baking in the oven is, for many, the quintessential scent of the holidays. While mashed potatoes hold a special place on the table, it's often the stuffing that guests eagerly anticipate each year. This make-ahead stuffing recipe is designed to deliver that beloved flavor with minimal fuss on the big day, offering bake, freeze, and Crock Pot options to fit any schedule. Boasting thousands of 5-star reviews, this family-favorite ensures perfect results every time – a truly easy homemade stuffing recipe that will become a cherished tradition.
At its heart, a truly great stuffing recipe is built upon simple, yet crucial, ingredients working in harmony to create a symphony of textures and tastes:
The Crucial Role of Dry Bread
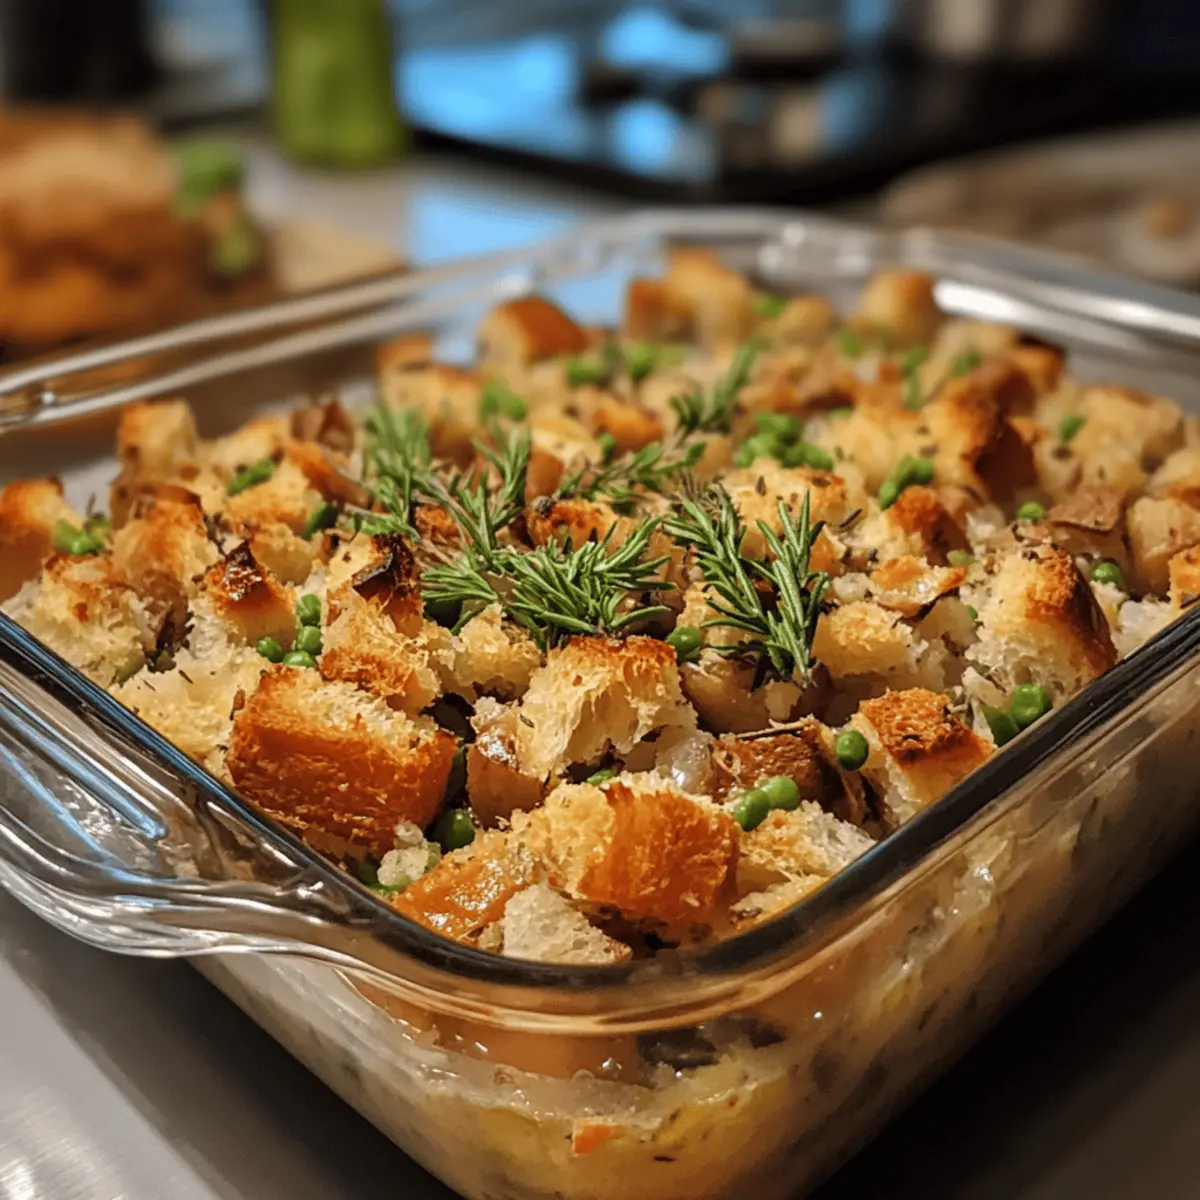
The foundation of any exceptional stuffing is, without question, the bread. While it might seem counterintuitive, the key is ensuring your bread is *very dry* before it meets any liquid. This isn't just a suggestion; it's the golden rule for preventing a soggy, dense dish. Dry bread acts like a sponge, ready to absorb all the delicious broth and seasonings without falling apart.
*
Choose Your Loaf: Any dry bread works beautifully, from classic white or wheat to more adventurous choices like sourdough or even a mix including cornbread. Tearing it into rough cubes rather than cutting provides more irregular surfaces for crisping and soaking.
*
Air Drying (The Easiest Way): Plan ahead! Purchase your bread a few days in advance, tear it into cubes, and spread them out on a baking sheet or clean counter. Let them air dry for 1-2 days. This slow process allows moisture to evaporate naturally.
*
Quick Oven Method: In a pinch, you can dry fresh bread cubes in a low oven. Spread them in a single layer on a baking sheet and bake at 300°F (150°C) for about 10-15 minutes. The goal is to dry them out, not to toast or brown them. They should feel firm and somewhat crisp.
*
Store-Bought Cubes: If convenience is king, pre-dried bread cubes are a great option. If they are already seasoned, simply adjust the amount of added salt and herbs in your recipe accordingly. Sometimes, these may need a little extra broth due to their intense dryness.
Building Layers of Flavor: Aromatics and Seasoning
Once your bread base is ready, it's time to infuse it with the classic, comforting flavors that define holiday stuffing.
*
The Aromatic Duo: Celery and Onions: These humble vegetables are the backbone of this stuffing's savory profile. Sautéing them gently in a generous amount of butter until tender sweetens them and creates a rich, fragrant base that permeates every bite. Don't rush this step; it's where much of the stuffing's depth originates.
*
Classic Seasonings: Poultry seasoning is your secret weapon here, providing that instantly recognizable "turkey dinner" flavor. It's typically a blend of sage, thyme, rosemary, and other warming spices that perfectly complement the savory elements. If you don't have poultry seasoning, ground sage is an excellent substitute that will still deliver that essential earthy note.
*
The Liquid Lifeline: Broth: Chicken or turkey broth introduces moisture and binds all the ingredients together. The exact amount you'll need can vary significantly depending on how dry and absorbent your bread is. Start with the recommended amount and add more as needed, aiming for moist bread cubes that are saturated but not swimming in liquid. You want them plump and flavorful, ready to bake into a tender center with those irresistible crispy edges. For an even richer flavor, consider using homemade broth.
Creative Additions to Personalize Your Stuffing
While this easy stuffing recipe is perfect as is, it's also incredibly forgiving and adaptable. Feel free to make it your own with thoughtful additions:
*
Vegetable Boosts: Shredded carrots can add a touch of sweetness and extra nutrition.
*
Fruity Notes: Dried cranberries or golden raisins offer a pleasant tartness or sweetness that beautifully contrasts the savory herbs.
*
Savory Depth: Cooked sausage (sage sausage works wonderfully!), chopped chestnuts, or sautéed mushrooms can elevate the stuffing to a meal in itself.
*
Dietary Considerations: For a lighter option or to cater to vegetarian guests, vegetable stock can easily replace chicken or turkey broth, especially when paired with a meat-free sausage substitute.
For more insights on perfecting the texture and avoiding common pitfalls, you might find valuable tips in
Perfect Stuffing: Tips for Crispy Edges & No Soggy Bread.
Make-Ahead Magic: Preparing, Baking, and Freezing Your Stuffing
The true beauty of this stuffing recipe lies in its versatility, particularly its make-ahead capabilities. This allows you to tackle holiday meal prep without the last-minute stress, ensuring you can enjoy the festivities as much as your guests.
Preparing Ahead: Refrigeration for Freshness
One of the simplest ways to get ahead is to prepare the stuffing mixture in advance, right up to the point of baking.
*
Assemble and Store: Combine all your ingredients in a casserole dish, cover it tightly with plastic wrap or foil, and refrigerate for up to 2 days. This not only saves time but also allows the flavors to meld and deepen, resulting in an even more delicious stuffing.
*
Ready for the Oven: Before baking, remove the casserole dish from the refrigerator and let it sit at room temperature for at least 30 minutes. This helps ensure even cooking. You may need to add an extra 5 to 10 minutes to the usual baking time since the stuffing will be starting from a colder temperature.
Freezing for Future Feasts
If you're a fan of making extra or want to prepare way in advance, this stuffing freezes beautifully for up to 4 months.
*
Freezing Baked Stuffing: Once baked and cooled completely, wrap the stuffing (either in the casserole dish or individual portions) tightly in plastic wrap and then foil. Label clearly with the date.
*
Freezing Unbaked Stuffing: You can also freeze the prepared, unbaked stuffing mix. Transfer it to a freezer-safe container or a disposable foil baking dish, cover well, and freeze.
*
Thawing and Reheating: To reheat, thaw the frozen stuffing overnight in the refrigerator or use the defrost setting on your microwave. Once thawed, bake in a casserole dish at 350°F (175°C) for 15 to 25 minutes, or until heated through and the top is golden and slightly crispy.
Crock Pot Convenience: A Hands-Off Approach
Freeing up oven space is a game-changer during holiday cooking, and a slow cooker offers an excellent alternative for cooking your stuffing.
*
Benefits: The Crock Pot ensures a consistently moist stuffing with less effort, and it keeps it warm for extended periods without drying out. While you won't get the same crispy edges as oven-baking, the interior will be wonderfully tender.
*
Preparation: Lightly grease your slow cooker insert. Add the prepared stuffing mixture, cover, and cook on low for 3-4 hours or on high for 1.5-2.5 hours, or until heated through and set. Stirring halfway through can help with even cooking. For a slightly crisper top, you can broil it briefly in the oven after cooking, or transfer the top layer to a baking sheet.
Serving Up Perfection: Baking, Crock Pot, and Turkey Stuffing
Whether baked to golden perfection, gently cooked in a slow cooker, or even nestled within your holiday bird, this stuffing recipe promises to be a highlight of your meal.
Baking for Optimal Texture
Most enthusiasts agree that baking stuffing in a casserole dish yields the ideal texture: a wonderful combination of buttery-soft interior and deliciously crisp, golden-brown edges. This is technically what differentiates it from "stuffing" (cooked inside a bird) to "dressing" (cooked separately), but the names are often used interchangeably in home kitchens. Baking it separately also ensures both the turkey and the stuffing cook evenly and reach safe temperatures without overcooking either component.
The Art of Stuffing a Turkey (with Safety in Mind)
While cooking stuffing separately is often recommended for safety and convenience, some traditions simply demand a stuffed turkey. If you choose to stuff your bird, adherence to food safety is paramount.
*
Cool First: Ensure your prepared stuffing has cooled in the fridge for at least 45 minutes before placing it inside the turkey. This prevents it from raising the internal temperature of the bird too much, risking extended cooking times or unsafe zones.
*
Stuff Just Before Roasting: To minimize the time the stuffing sits at an unsafe temperature, stuff the turkey immediately before it goes into the oven.
*
Temperature Check: The most critical rule: the center of the stuffing *must* reach an internal temperature of 165°F (74°C). Use a meat thermometer to verify this. The drippings from the turkey will infuse the stuffing with incredible flavor, but safety can't be compromised.
Regardless of your cooking method, this recipe consistently delivers a memorable side dish that pairs perfectly with your holiday feast. It's truly an
Easy Homemade Stuffing: 5-Star Family Favorite for Holidays.
This make-ahead stuffing recipe is more than just a side dish; it's a celebration of comfort, tradition, and clever kitchen management. With its simple ingredients, adaptable preparation methods, and delicious outcome, it’s destined to become a beloved staple in your holiday repertoire. By utilizing the bake, freeze, and Crock Pot options, you can reduce stress and ensure that this crowd-pleasing dish is ready whenever you are. So go ahead, prepare it ahead, and savor every buttery, herb-infused bite. Your taste buds—and your holiday schedule—will thank you.